Thursday, 16 November 2017

Task 2 - Creation of the Unreal Environment 16.11.17

Creation of the Unreal Environment

In my unit 2, I have made the environment in the engine added in the animations. Now I can focus upon the environment in my scene and add in the assets. Following from the idea of the storyboard, I have added in the crystals that I have made and added them into the scene.


As you can see from the image above, I have captured the idea from my storyboard and added it into my game. Each scene will be split into different levels, so that it will not be to heavy on the game. The main landscape plan for this storyboard will be having scene one - three the custom landscapes and the second one a height map. The second scene will have a lot of detail and because of that I will have to use a height map to capture that large detail. 

Task 2 - Landscape Creation in the Scenes 16.11.17

Landscape Creation in the Scenes

There are many ways I can create the environment for my scenes, but for this project I decided to go for a manual creation via the use of the Unreal Engine. I used their community website so help make he scene I am after.

Scene 1 and 3

The landscape settings
By adjusting the settings in the landscape I can create the map in any size I like. Like texture maps, the scale follows the power of two settings and the larger the scale the larger the map. because the scene 1 and 2 are small I only need a small map, so for the scenes I went for the 64x64.

The sculpting tools in Unreal Engine
With the layout done, I can now begin to sculpt the landscape to make liking. There are various tools that I can use, such as the sculpt and smooth tools to build up the ;landscape and alter its shape. This is a small landscape, so I do not need to do much to change the terrain. For scene 2 however, I will have to use a different approach.

Scene 2

A example height map
Because I am working on a bigger scene I will need a large landscape. But manually working on this would take ages so I would have to use a height map instead. For the height maps I have taken a example from the internet. I can also use the other software to create a more realistic landscape.

A height map imported into the viewport
 In order for me to import them, I first need to make them PNG. Once done they will appear as a green outline in the viewport. The problem with height maps is that the texture has got to be the exact same size when you import them into the viewport. Otherwise they will have errors. With the correct dimensions I can then modify them  in the landscape editor, if I need to make an other changes.
  

Task 1 - Unreal scales for the scenes 16.11.17

Unreal scales for the scenes

Even though the scene itself was made with just landscapes in the Unreal Engine, there are some assets that I used to create the 3rd scene. Using the idea from the world of level design website, I made the walls  using the following scales:

Walls

Height - 300uu
Width - 600uu
Depth - 20uu

Cave Walls

Height - 590uu
Width - 490uu

Cave Arch

Height - 300uu
Width - 600uu
Depth - 20uu

Most of the work will via the use of the landscape creation tool and some assets to help build up the scenes.

Tuesday, 14 November 2017

Task 1 - Museum Trip Reference Shots 11.11.17

Museum Trip Reference Shots

Museum Moodboard
Getting references from the internet is always a good way of acquiring some asset inspirations. But I want to find some images for myself and use them for some ideas. I decided to get the shots from the Liverpool World Museum because that is the best place to find some aquatic and geologically shots. My main focus point was on the underwater terrain and the minerals. These are the kind of models I want to have in my scenes, so getting to know their texture structure will be essential for me to create a more realistic world.

But I decided to take more then just these shots. Since this is a alien world I took some shots of hydroponics, so I can see how I can make some interesting writing and also how they are carved into the rocks. In addition to this I took some space-themed images too, to capture the sci-fi element of my game. Even though the game will be centred around the underwater and crystal environments, I still want to show some signs of life in this world. 

I got some great shots from the museum and they have really helped me to understand the ways rocks are textured and how the different environments change the way the rocks looks. Those underwater images allowed me to see how lights behaves, which will be very useful for the post-processing. 

Monday, 13 November 2017

Task 1 - Top Down Views of my Scene 13.11.17

Top Down Views of my Scene

The top-down views of my scenes
All three of my scenes will have their own objectives I will have to follow a certain path. To help me visualise this idea better, I made some top drawings. The arrow will indicate the path the character will take and I highlighted the place where the assets will be. I want them as close to the characters as possible, just so that the camera will be able to get those assets in the shot too. This scene will have some different sizes, but they should not be too hard. The only hard one will be the second one, because of the scale.

Each scene will have a certain number of assets. These are:


  • Crystal pillars - large with cold textures
  • Crystal bushes - small and follow the similar colour palette 
  • Cave walls - following a modular creation  
  • Crystal monster - acts as one of the aliens in the world
  • Drone - the machine the player will control
  • Character - the main player and the key part of the story
  • Rocks - acts as a atheistic element
Games such as Monster Hunter World always show of the environment in a way that is both visually appealing and  a way to draw the player to this world.  I will be doing the same to some assets:

Crystal trees and bushes - These will have a glowing effect to give them a sense of life.
Other crystal beings - I am planning on having some small creatures that will blow around with he wind.
Weather effects - there will be some element of decay in the world. I wanted this to be a way to drive the story.

Following these ideas I will able to make my scenes more surreal more importantly believable. 

Sunday, 12 November 2017

Task 1 - Story Mindmap 12.11.17

Story Mindmap

The story mindmap
In addition to making a environment mindmap, I also need to make a story mindmap too, to further breakdown my idea. I split it into each scene and note down what I want to happen in each of them. I also made one for additional details, such as the number of shots I need for the whole scene completion. Having this kind of idea written down will help me to develop the story when I get to the sequencer creation process. 

Saturday, 11 November 2017

Task 1 - Scene Plan 11.11.17

Scene Plan

Scene 1

Throughout the course of this game storyboard, the character will go to multiple locations. These will act as the game cut-scenes, while the main game itself will take place on another level. I have created a simple idea on how I want the game environment to look like in the Unreal Engine.

A sketch drawing of the game environment 
As you can see in this picture, this scene will set of the introduction to the environment. While the first scene will take place on this level, the other two will done on separate levels. This not just helps to identify a cut-scene on the game, but also makes it easier for me to managed the creation of them. At the current moment the game project itself is at its blockout stage. This means that not all the gameplay functions are active and the game assets are not present. Once the cut-scene is complete, I can ten move on to the game creation. I used the Pinterest image to help be create the environment.

Scene 2


The scene 2 concept sketch
My main idea for this scene is to have just the drone to explore the environment. This will require a large landscape will tall pillars of crystals to create the illusion of scope and scale. As you can see in the image above, the small plateau will be the place where the drone will be located. Because of the large scale of this scene, this will take the most time to build. But it will go well with the full story of the game and capture the scale of the landscape. The pinterest board was used again to acquire the references I need to make the scene.

Scene 3


The scene 3 landscape 
This sketch is a small one, but places an important part of the story. This is the place where the two characters will encounter a strange being and get dragged into a mysterious world. Unlike the previous levels, this will be done with assets to create the cave landscape. The crystals pillars that where made in the previous levels will be positioned to create a path leading to the end of the cave, where that create is. This kind of idea was inspired by the exploration of alien buildings, as seen from Mass Effect Andromeda.  

Friday, 10 November 2017

Task 1 - Environment Drawings 10.11.17

Environment Drawings

With the moodboard plan laid out, I decide to go into more detail with the environmental design by attending a museum. It is here that I will get some hands-on approach with the crystals by looking at their shape and colour design. I will also get some advice from the  staff their too will will help me further with my project. This kind of method is seen in the gaming industry a lot. The game Monster Hunter World for example went to real world locations so as Australia and Indonesia. 

The environment sketch plan

As you can see in the image above I have I have made some sketch plans of the models that I will amke and the layout I want them to be. The image text reads:

Crystal design:
  1. Crystals embedded into rocks to enhance environment. 
  2. Crystals will glow via material
  3. A particle effect will be applied to give them a more frozen feel
Crystal Layout and scene plan:
  1. Player character walks down this cave to find a object.
  2. The object will set the tone for the gameplay.
  3. Crystals pillars will have a symbolic appearance via the placement of the assets.
  4. Particle effects will also be added here to create the ambience.
Having these drawings will help to create the basic blockout of my Unreal Project. The crystals will play a key role in this game, so these drawings will help me to structure them in a way that both applies gameplay functionally and visual appeal.

Task 1 - Scene Drawings 10.11.17

Scene Drawings

During this unit, I have learned a lot about perspective drawings. My art skills are not my strongest point, but I have tried my best to make them as professional as possible. Below are the sketch plans I made for the scene environments.


I have used some perspective for these images, most of them being in the one-point perspective. The canyon for example is in that layout. I wanted to drawing some mountains to visualise my idea with the crystal with them. It is by doing this that I can get the landscape design I want for the project.

Thursday, 9 November 2017

Task 1 - Landscape Layout Plan 9.11.17

Landscape Layout Plan

Before I stared the sketch plans, I first wanted to get some references to some landscapes. This will requires some images from the internet, but I can also get some examples from the museums. The shots that I will be focusing on.

  • Terrain Layout
  • Environmental Visuals
  • Tunnel Layouts
It is by using these references that I can get a better idea of my game environment and to get that realistic feel. They will also give me some ideas for the interactive elements and decied if they are needed or not.

Terrain Layout

Terrain Layout Moodboard

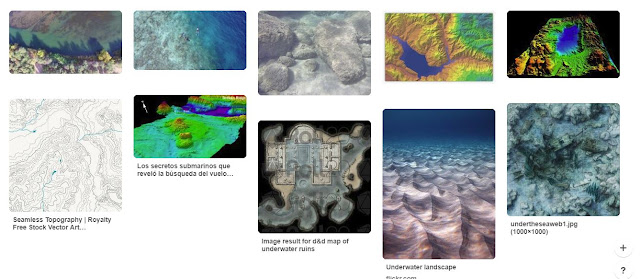
This moodboard shows all of the top-down layout plans for the underwater environment. I can also blend this with the crystal environments as well to further increase the diversity.


This moodboard shows all of the assets that I can create for this game environment project. Some of these assets will be very handy for some interactive elements and atheistic visuals. 

The tunnel moodboard
I wanted my game to have some tunnels, to add another visual effect and to add more to the story. having all of these images references, will allow me to create a tunnel that is suutable for my game.

Wednesday, 8 November 2017

Task 1 - Alternative Shots 8.11.17

Alternative Shots

Even though the story follows a linear path, I am going to add in a alternate scene in my cut-scenes. This will allow the player to have the option to chose another path for the character, be it a good one or bad. In addition to this this may need to more stories development and extra QTE (Quick Time Events).

An Alternate storyboard
 As you can see in this images if the player picked the option to touch the tentacle, the character will grab it and fall to his demise. It is a short shot, but it tells the player that you picked the wrong choice. Even though I have only made one shot, I may plan to add more alternative scene, if the story demands it.